Natural gas, propane, and other combustible gases power millions of homes. They heat water, cook meals, and warm living spaces, but they also pose serious risks when leaks go undetected. A combustible gas leak detector acts as a 24/7 sentry, sniffing out dangerous concentrations before they ignite or cause carbon monoxide poisoning. Unlike smoke alarms, which most homeowners install without a second thought, gas detectors remain optional in many jurisdictions. That’s a gap worth closing. Whether you’re running natural gas appliances, using propane tanks for your grill, or heating with fuel oil, understanding how these devices work and where to place them can prevent catastrophic outcomes.
Table of Contents
ToggleKey Takeaways
- A combustible gas leak detector acts as a 24/7 safety device that triggers an alarm when flammable gas concentrations reach dangerous levels, often within 60 seconds of detection.
- Mount combustible gas leak detectors based on gas type: high on walls for lighter methane (natural gas) and low near the floor for heavier propane, within 15-20 feet of fuel-burning appliances.
- Quality detectors cost $50–$100 for standalone models and should be UL 1484 certified to ensure accurate sensor performance and meet residential safety standards.
- Test your combustible gas leak detector monthly by pressing the test button, replace batteries annually, and replace the entire unit every 5-7 years as sensors degrade over time.
- Natural gas odor can fade in certain conditions, making a combustible gas leak detector essential since your nose alone cannot reliably detect leaks that could cause explosions or asphyxiation.
- If an alarm sounds, evacuate immediately and call emergency services from outside—never investigate the source with an open flame or turn lights on/off, as sparks can ignite accumulated gas.
What Is a Combustible Gas Leak Detector and How Does It Work?
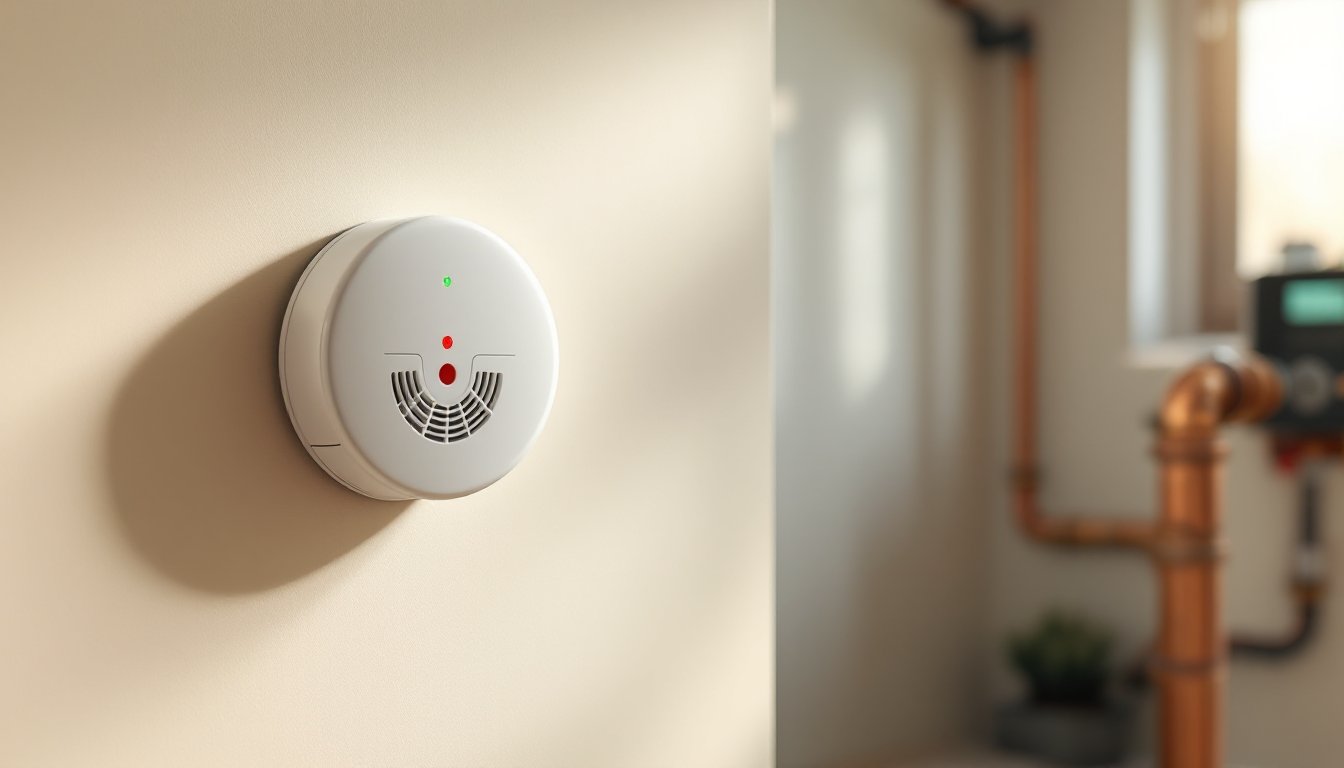
A combustible gas leak detector is a standalone or integrated device that monitors the air for flammable gases, primarily methane (natural gas), propane, and butane. When gas concentration reaches a preset threshold (usually between 5% and 15% of the Lower Explosive Limit, or LEL), the unit triggers an audible alarm and often a visual indicator.
Most residential detectors use catalytic bead sensors or semiconductor sensors. Catalytic models oxidize gas molecules on a heated coil, creating a measurable change in electrical resistance. Semiconductor sensors rely on metal oxide layers that react to combustible gases, altering conductivity. Both technologies are proven, but catalytic sensors tend to offer longer lifespan and better accuracy at lower concentrations.
Modern units often bundle methane and propane detection in one device, since households may use both fuel types. Some high-end models also detect carbon monoxide (CO), which is a byproduct of incomplete combustion rather than a combustible gas itself. Don’t confuse the two: CO detectors and combustible gas detectors serve distinct purposes, though combination units exist.
Response time matters. Quality detectors alarm within 60 seconds of detecting dangerous concentrations. Cheaper models may lag or produce false positives from aerosol sprays, alcohol vapors, or high humidity. Look for units certified to UL 1484 (for residential combustible gas detectors) to ensure they meet minimum performance standards.
Why Every Homeowner Needs a Gas Leak Detector
Natural gas is odorless in its pure form: utility companies add mercaptan, a sulfur compound, to give it that signature rotten-egg smell. But mercaptan can fade in certain conditions, old pipes, humid basements, or high airflow, leaving slow leaks undetectable by nose alone. Propane is heavier than air and settles in low spots, so a leak in a basement or crawlspace may go unnoticed until concentrations become hazardous.
The risks are two-fold: explosion and asphyxiation. Even a small spark, from a light switch, pilot light, or static discharge, can ignite accumulated gas. In confined spaces, displaced oxygen can cause unconsciousness before anyone smells a problem. According to home safety data, gas-related incidents remain a leading cause of residential fires and carbon monoxide poisoning.
Building codes vary. The International Residential Code (IRC) doesn’t mandate gas detectors in most single-family homes, though some states and municipalities require them near fuel-burning appliances or in new construction. Even if your jurisdiction doesn’t require one, insurance companies increasingly recommend them, and some offer premium discounts for homes with monitored safety systems.
Installation is straightforward, cost is minimal (quality units run $40–$100), and the peace of mind is worth far more than the price tag. If you’ve ever smelled gas and second-guessed yourself, a detector removes the ambiguity.
Types of Combustible Gas Detectors for Home Use
Combustible gas detectors fall into several categories based on power source, features, and integration. Understanding the differences helps you match the device to your home’s layout and fuel sources.
Single-gas vs. multi-gas detectors: Single-gas models detect either methane or propane. Multi-gas units monitor both, plus sometimes CO. If you use natural gas for heating and propane for outdoor appliances, a multi-gas detector simplifies coverage.
Standalone vs. smart detectors: Standalone units sound a local alarm. Smart detectors connect via Wi-Fi or Z-Wave to send alerts to your phone, integrate with home automation systems, and log event histories. Smart models are useful if you travel frequently or want remote monitoring, but they cost more and require network connectivity. Brands with smart home integration often bundle gas detection with smoke and CO alarms for whole-home coverage.
Fixed-mount vs. portable: Fixed units install permanently near appliances or in utility rooms. Portable detectors, often handheld wands, are used by HVAC techs and plumbers to pinpoint leak sources. Homeowners rarely need portable units unless troubleshooting a suspected leak before calling a pro.
Plug-In vs. Battery-Powered Models
Plug-in detectors draw power from a 120V outlet and often include battery backup. They’re reliable for long-term monitoring in areas with accessible outlets, laundry rooms, utility closets, or near water heaters. The constant power means no dead batteries, but placement is limited to outlet locations.
Battery-powered models offer flexibility. Install them anywhere, basements, crawlspaces, or garages, without worrying about outlet access. Most use AA or 9V batteries and include low-battery alerts. The downside: batteries die, and if you ignore the chirp, you lose protection. Sealed lithium-cell units with 10-year lifespans eliminate battery swaps but cost more upfront.
For most homes, a plug-in unit with battery backup near the furnace or water heater, plus a battery-powered model in the basement or garage, provides solid coverage without overkill.
How to Choose the Right Gas Leak Detector for Your Home
Start by identifying your fuel sources. If you’re on municipal natural gas, you need methane detection. Propane tanks (for grills, RVs, or whole-house systems) require propane-specific sensors. Many homes use both, so a dual-fuel detector makes sense.
Check the sensor lifespan. Catalytic and semiconductor sensors degrade over time, typically 5 to 7 years. Some manufacturers sell units with replaceable sensors: others require full device replacement. Factor replacement cost into your budget.
Alarm volume should exceed 85 decibels at 10 feet. If the detector is in a basement or garage, you need enough volume to wake sleeping occupants upstairs. Look for models with both audible and visual alarms (flashing LEDs) for added redundancy.
Certification matters. UL 1484 is the baseline for residential detectors. Some units also carry CSA or ETL marks. Avoid uncertified imports: sensor accuracy and durability vary wildly in off-brand models.
Consider smart features if you want remote alerts. Wi-Fi-enabled detectors from brands like Nest or First Alert integrate with existing smart home ecosystems and send push notifications when triggered. They’re overkill for a single-story home where you’d hear a local alarm, but invaluable if you’re often away or own rental properties.
Budget $50–$100 for a quality standalone detector, $100–$200 for a smart model. Avoid bottom-shelf units under $30: sensor quality and false-alarm rates make them more trouble than they’re worth. If your project budget is tight, home improvement cost guides can help prioritize safety upgrades alongside other work.
Installation and Placement Tips for Maximum Protection
Placement depends on the gas type. Methane (natural gas) is lighter than air and rises, so detectors should mount on the ceiling or high on a wall, within 12 inches of the ceiling and at least 6 inches from any corner. Avoid placing them near windows, doors, or vents where drafts can disperse gas before detection.
Propane and butane are heavier than air and sink. Mount these detectors low, within 6 to 12 inches of the floor, in areas where propane appliances or tanks are stored. Common spots include basements, garages, and utility rooms.
Install detectors within 15 to 20 feet of fuel-burning appliances: furnaces, water heaters, ranges, and dryers. If your home has multiple gas appliances spread across floors, consider one detector per level.
Avoid kitchens with gas ranges for the primary detector: cooking vapors, humidity, and temperature swings increase false alarms. Instead, place it in an adjacent hallway or utility room where it can still detect leaks from the range but isn’t exposed to daily cooking byproducts.
Installation steps for plug-in models:
- Choose an outlet near the target appliance, avoiding areas with excessive moisture or temperature extremes.
- Plug in the unit and verify the power indicator lights up.
- Press the test button to confirm the alarm sounds.
- Some models require a 24-hour warm-up period before full sensitivity kicks in, check the manual.
For battery-powered units:
- Insert fresh batteries (lithium cells last longer than alkaline).
- Mount the bracket using the included screws. Use drywall anchors if mounting on drywall without a stud.
- Snap the detector onto the bracket.
- Test immediately and mark the installation date on the unit.
Never paint over a detector or cover vents. Sensors need unobstructed airflow to function. Keep detectors at least 3 feet from sources of steam or high humidity (showers, laundry vents) to reduce false positives.
Maintenance and Testing: Keeping Your Detector Reliable
Gas detectors require minimal upkeep, but neglect leads to failure. Test monthly by pressing the test button, it should trigger the alarm within seconds. If the alarm is weak or doesn’t sound, replace batteries immediately or replace the unit if it’s beyond its sensor lifespan.
Dust and debris clog sensor ports. Vacuum the exterior gently with a soft brush attachment every 3 to 6 months. Don’t use compressed air: it can force particles deeper into the sensor chamber.
Replace batteries annually, even if the low-battery alert hasn’t sounded. Mark battery-change dates on your calendar alongside smoke alarm maintenance. For sealed lithium units, note the 10-year replacement date on the device itself.
Sensor lifespan: Most residential detectors expire after 5 to 7 years, regardless of how often they’ve alarmed. Sensors drift out of calibration over time, increasing false alarms or missing real leaks. Check the manufacture date (usually stamped on the back) and replace units that exceed their rated lifespan.
If the detector alarms:
- Do not investigate the source with an open flame or by turning lights on/off (sparks can ignite gas).
- Evacuate everyone immediately.
- Call 911 or your gas utility’s emergency line from outside the home.
- Don’t re-enter until a professional clears the building.
False alarms happen. High humidity, aerosol sprays, and alcohol-based cleaners can trigger semiconductor sensors. If false alarms are frequent, relocate the detector away from bathrooms, laundry areas, or spray-paint zones. Persistent false alarms may indicate sensor degradation, replace the unit.
Keep the user manual. It lists sensor type, replacement intervals, and troubleshooting steps. File it with other appliance docs or photograph it for digital storage.
A combustible gas leak detector won’t prevent a leak, but it buys you the seconds needed to evacuate safely. Pair it with regular appliance maintenance, annual furnace inspections, checking hose connections on propane tanks, and replacing aging gas lines, for a comprehensive approach to fuel safety. It’s a small investment that addresses a low-probability, high-consequence risk every homeowner faces.