Deck railing brackets are the unsung heroes of outdoor living spaces. They’re the hardware that connects your railing posts to the deck frame, and when chosen and installed correctly, they disappear into the background while keeping everything rock-solid. Get them wrong, though, and you’re looking at wobbly railings, code violations, or worse, a safety hazard. Whether you’re building a new deck or retrofitting an existing one, understanding the bracket types, load requirements, and installation techniques will make the difference between a weekend project that lasts decades and one that needs a do-over next summer.
Table of Contents
ToggleKey Takeaways
- Deck railing brackets must transfer vertical and lateral forces safely to meet IRC’s 200-pound load requirement, making proper selection and installation critical for safety and code compliance.
- Surface-mount and side-mount deck railing brackets each serve different deck designs—surface-mount works for retrofits without rim joist modifications, while side-mount improves drainage and reduces rot at the post base.
- Choose brackets based on post size, load rating, material durability (galvanized steel, stainless steel, or powder-coated aluminum), and fastener compatibility to ensure long-term structural integrity.
- Blocking installation, proper fastener selection, and avoiding over-tightening are essential to prevent deck railing bracket failure and costly repairs.
- Always verify local building codes and obtain permits before installing deck railing brackets, as requirements vary by jurisdiction and inspectors scrutinize fastener schedules and bracket specifications.
What Are Deck Railing Brackets and Why Do They Matter?
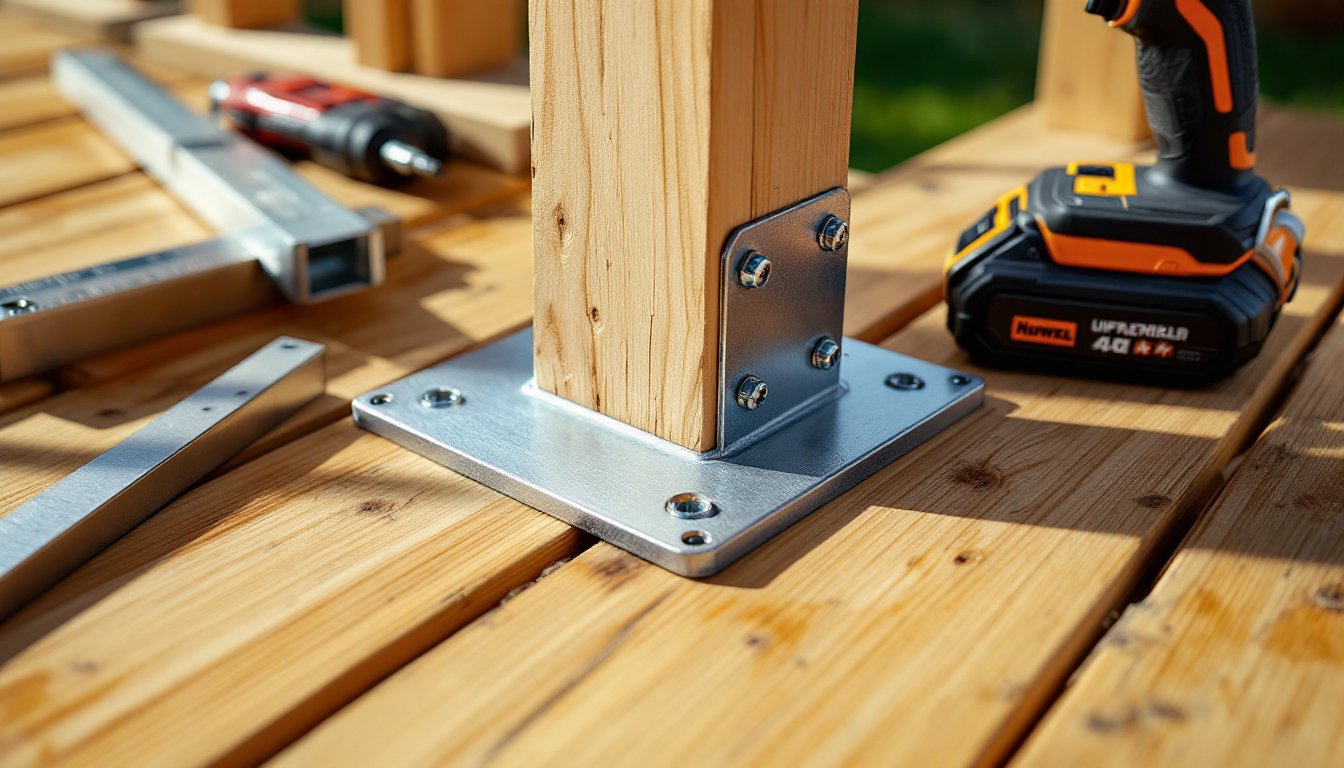
Deck railing brackets are structural connectors that anchor railing posts to the deck’s rim joist, surface decking, or blocking. They’re typically made from galvanized steel, stainless steel, or powder-coated aluminum, and they’re engineered to handle both vertical loads (people leaning) and lateral loads (people pushing outward).
The International Residential Code (IRC) requires deck railings on any walking surface more than 30 inches above grade, and those railings must withstand a 200-pound concentrated load or a 50-pound-per-linear-foot distributed load applied in any direction. Brackets are what transfer those forces safely into the deck structure. Skimping here isn’t an option, undersized or improperly installed brackets are a leading cause of deck railing failure.
Most jurisdictions require a building permit for new deck construction or significant railing replacement, and inspectors will check bracket type, fastener schedule, and blocking. Even if you’re doing the work yourself, it’s worth a call to your local building department to confirm requirements before you buy materials.
Types of Deck Railing Brackets for Every Project
Surface-Mount Brackets
Surface-mount brackets (also called deck-mount or base-mount brackets) attach directly to the top of the deck surface. They’re the go-to choice when you don’t want to notch posts or when your rim joist is already obscured by fascia.
These brackets work with both wood and composite decking, but they require solid blocking underneath, you can’t just screw into a single deck board. Install a double joist or add 2×8 or 2×10 blocking between joists wherever a post will land. The bracket base should be at least 4 inches square, and most quality models include a removable post collar that lets you adjust the post position slightly before final tightening.
Surface-mount brackets are popular for retrofits because they don’t require you to tear into the rim joist, and many models come powder-coated in black or bronze to blend with metal or cable railings. Expect to pay $15–$30 per bracket depending on finish and load rating.
Side-Mount Brackets
Side-mount brackets (sometimes called rim-mount or fascia-mount brackets) attach to the face of the rim joist or blocking, with the post sitting beside the deck edge rather than on top of it. This style is common on decks with picture-frame borders or where you want the post to sit flush with the deck perimeter.
Side-mount brackets typically use four to six lag screws or structural screws driven into the rim joist, and the post is held in a U-shaped or L-shaped cradle. Because the fasteners are driven perpendicular to the grain of the rim joist, you’ll often need to add a second rim joist or install blocking to meet code, most jurisdictions require the rim to be at least 2× nominal thickness at post locations.
One advantage: side-mount brackets keep posts off the deck surface, which improves drainage and reduces wood rot at the post base. They’re also easier to flash properly with metal drip edge or membrane. Drawback: they’re more visible from below, so finish matters. Look for brackets with clean welds and a finish that matches your other hardware.
How to Choose the Right Brackets for Your Deck Railing
Start with your railing post size. Most residential deck posts are 4×4 nominal (actual 3.5″ × 3.5″), and brackets are sized accordingly. If you’re using metal or composite posts, measure the actual dimensions, some composite posts are 3.25″ or 3.75″ and need a snug-fit bracket or shims.
Next, check the load rating. Quality brackets will list their tested capacity: look for products that meet or exceed the IRC’s 200-pound load requirement. Many manufacturers publish load tables showing allowable span between posts based on bracket type and railing material. The proper bracket spacing and capacity ratings ensure your railing system performs safely under load.
Material and finish matter more than you’d think. Galvanized steel brackets are the workhorse, affordable and strong, but they rust over time, especially in coastal or high-humidity areas. Stainless steel (304 or 316 grade) costs 2–3× more but lasts indefinitely. Powder-coated aluminum is lighter and corrosion-resistant, though it’s not as strong: verify the load rating before using it on a high deck.
Finally, consider fastener compatibility. Some brackets are designed for lag screws, others for structural screws (like GRK or FastenMaster), and some for through-bolts. Structural screws are faster to install and don’t require pre-drilling, but lag screws with washers provide a visible, verifiable connection that inspectors appreciate. Through-bolts are overkill for most residential decks but may be required on commercial projects or decks over 10 feet high.
Step-by-Step Installation Guide for Deck Railing Brackets
Tools you’ll need:
- Drill/driver with bits
- Impact driver (optional but helpful)
- 4-foot level
- Speed square
- Tape measure
- Pencil
- Safety glasses and gloves
Materials:
- Railing brackets (one per post)
- 4×4 posts (pressure-treated or cedar)
- Lag screws or structural screws (per manufacturer specs)
- Blocking lumber (if needed)
- Post cap or trim (optional)
Step 1: Lay out post locations. Measure and mark post centers along the deck perimeter. Maximum spacing is typically 6 feet on-center for wood balusters, 8 feet for metal pickets, but always verify with your railing system’s specs. Posts must land at corners and on either side of stairs.
Step 2: Install blocking (if using surface-mount brackets). Cut blocking from joist stock (usually 2× lumber matching your joist depth) and install it between joists at each post location. Secure with three 3-inch deck screws or joist hanger nails on each end. The blocking should sit flush with the top of the joists so the deck boards bear fully.
Step 3: Position and fasten the bracket. For surface-mount brackets, center the bracket over the blocking and fasten through the decking using the fasteners specified by the manufacturer, typically ¼-inch lag screws at least 3 inches long or equivalent structural screws. For side-mount brackets, hold the bracket against the rim joist, level it, and mark your pilot holes. Drill pilot holes (slightly smaller than the screw shank), then drive fasteners.
Step 4: Set the post. Drop the post into the bracket. Use a 4-foot level on two adjacent sides to plumb it perfectly. Most brackets have set screws or collars to lock the post in place: tighten these snugly but don’t overtighten, you can crush the wood. For detailed installation walkthroughs and visual guides, many DIYers find step-by-step photo tutorials helpful.
Step 5: Secure the top. Once the railing is assembled, add a top-mount bracket or through-bolt at the top of each post to lock it to the top rail. This prevents the post from twisting or lifting. Some codes require a mechanical connection at both the base and the top of each post.
Step 6: Inspect and test. Before calling for an inspection, grab each post and push hard in all directions. There should be zero movement at the base. If anything flexes, add fasteners or blocking. Many building departments adopted stricter railing standards after widely publicized deck failures, so expect a thorough review.
Common Mistakes to Avoid When Installing Railing Brackets
Skipping blocking. Surface-mount brackets screwed into a single deck board will pull out under load. Always install solid blocking between joists, and make sure it’s tight to the underside of the decking.
Using the wrong fasteners. Deck screws aren’t structural fasteners. Use the lag screws, structural screws, or through-bolts specified by the bracket manufacturer. And don’t substitute shorter fasteners, 3-inch minimum penetration into solid wood is standard for a reason.
Over-tightening. Lag screws and structural screws can crush wood fibers if driven too hard, reducing their holding power. Snug is good: stripped threads or compressed wood isn’t.
Ignoring the rim joist condition. If your rim joist is old, spongy, or shows signs of rot, adding brackets won’t make it structural. You may need to sister a new rim joist alongside the old one or replace it entirely before installing railings.
Forgetting to flash. Water infiltration at bracket connections is a leading cause of premature rot. Use self-adhesive flashing tape over the rim joist before installing side-mount brackets, and seal any screw penetrations through decking with exterior-grade caulk.
Not checking local codes. Bracket type, fastener schedule, post spacing, and even railing height vary by jurisdiction. A quick call to your building department, or a check of your local amendments to the IRC, can save you from tearing out and redoing work after a failed inspection.