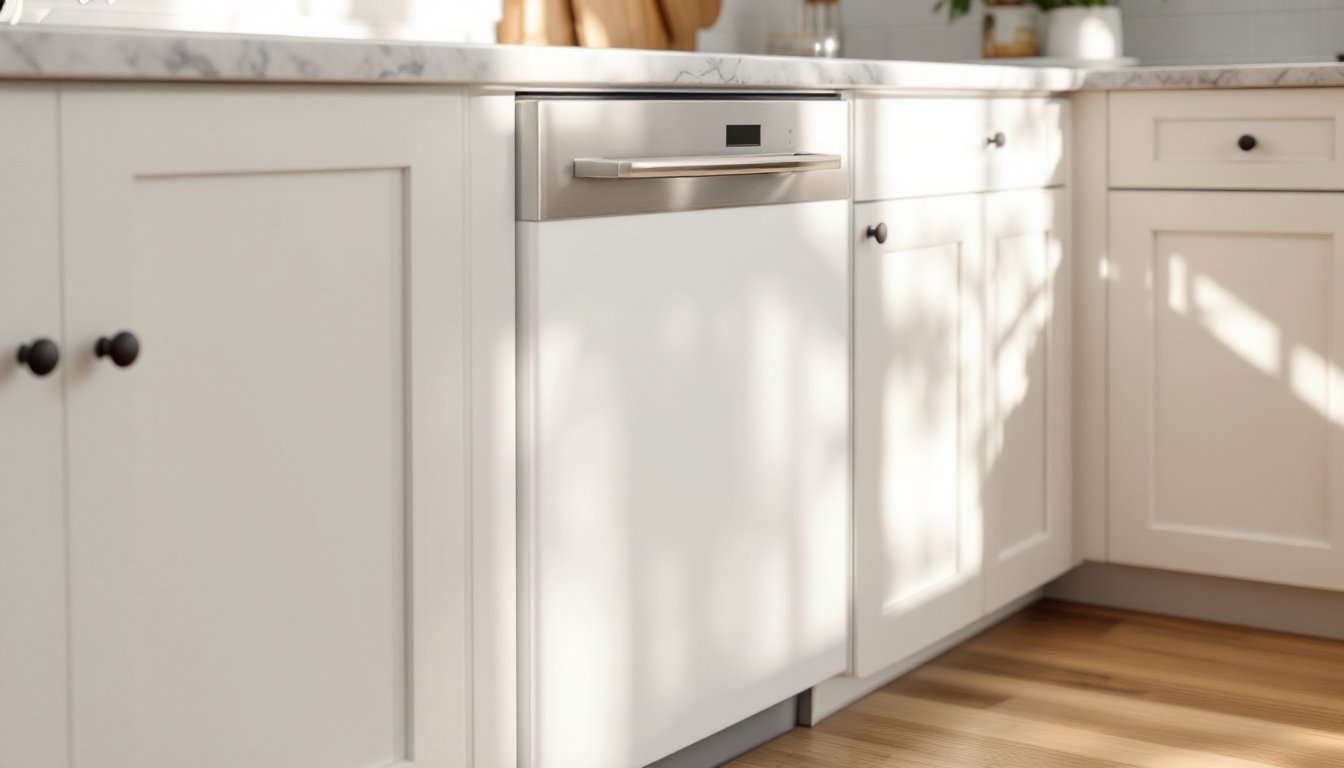
Most integrated dishwashers leave an exposed side when they sit at the end of a cabinet run. That unfinished edge, raw particleboard or a plain metal panel, breaks the visual flow of an otherwise polished kitchen. A dishwasher end panel solves that problem by covering the exposed side with material that matches the surrounding cabinetry. It’s a simple upgrade that makes a big difference in how finished the kitchen looks, and it’s well within reach for most DIYers with basic carpentry skills.
Table of Contents
ToggleKey Takeaways
- A dishwasher end panel covers the exposed side of an integrated dishwasher at the end of a cabinet run, creating a seamless, finished kitchen look while protecting the appliance from damage.
- End panels come in several styles—cabinet-matching veneer, finished plywood, stainless steel, and custom integrated options—allowing you to choose the best fit for your kitchen design and budget.
- Accurate measurement is critical: standard dishwashers are 24 inches wide by 34–35 inches tall, and the panel should align flush with the cabinet face for a professional appearance.
- Always finish raw panels with paint or stain before installation, level the dishwasher before attaching the panel, and secure it with at least three fasteners to prevent warping or movement.
- Common mistakes like using oversized screws, ignoring grain direction, and forcing a tight fit can compromise the installation, so precision and patience are essential for a polished result.
- Most DIYers can install a dishwasher end panel in an afternoon using basic carpentry tools, making it an affordable and impactful upgrade that transforms an unfinished kitchen edge.
What Is a Dishwasher End Panel and Why Do You Need One?
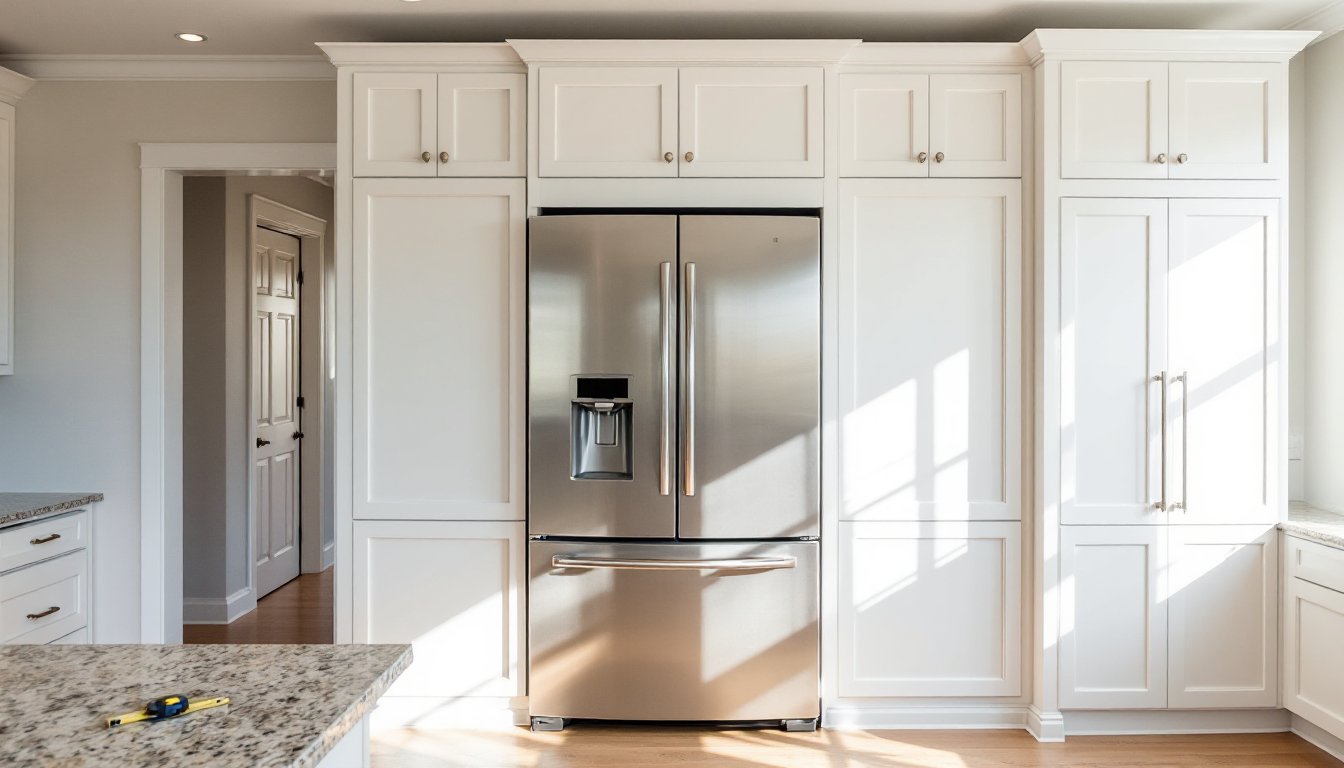
A dishwasher end panel is a decorative panel that covers the exposed side of a dishwasher when it’s installed at the end of a cabinet run or against an open wall. Unlike the dishwasher door, which is designed to be visible, the sides of most dishwashers are plain metal or plastic, not meant to be seen.
When a dishwasher sits between two cabinets, those sides are hidden. But at the end of a run, one side is fully visible. An end panel bridges that gap, matching the cabinet finish and creating a cohesive look.
End panels aren’t just cosmetic. They also protect the dishwasher’s side panel from dings and scratches, especially in high-traffic kitchens. They can hide gaps between the appliance and adjacent cabinetry, and they add a layer of finished detail that elevates the overall kitchen design.
Most custom and semi-custom cabinet lines include matching end panels as an option. Stock cabinets may require ordering separately or purchasing a universal panel that can be trimmed and finished to match.
Types of Dishwasher End Panels for Every Kitchen Style
End panels come in several formats, depending on the cabinet style and installation method.
Cabinet-matching veneer panels are the most common. These are flat or recessed panels made from the same material as the kitchen cabinets, melamine, thermofoil, wood veneer, or solid wood. They typically measure 24 inches wide by 34½ inches tall to cover the standard dishwasher height, though dimensions vary by manufacturer.
Finished plywood panels offer a budget-friendly alternative. A ¾-inch plywood panel with a matching veneer or paint finish works well in painted kitchens. These panels are often custom-cut on-site and finished to match.
Stainless steel or metal panels suit modern or industrial kitchens. These panels are thinner, usually 1/16 to ⅛ inch, and mount flush to the dishwasher side. They’re durable and easy to clean, but they don’t integrate as seamlessly with wood cabinetry.
Custom integrated panels are built to match high-end cabinetry with raised profiles, beadboard insets, or Shaker-style frames. These panels require precise measuring and often include edge banding or trim to match the cabinet doors.
Some cabinet manufacturers offer reversible panels with two different finishes, giving flexibility if the kitchen layout changes or if the dishwasher is moved.
How to Choose the Right End Panel for Your Dishwasher
Start by matching the panel to the existing cabinetry. If the cabinets are part of a known product line, order the matching end panel from the same manufacturer. This ensures the finish, grain pattern, and door style align perfectly.
For painted cabinets, a primed MDF or plywood panel can be painted to match using the same paint and sheen as the cabinets. Most cabinet paints are satin or semi-gloss for easy cleaning.
Measure the exposed side of the dishwasher carefully. Standard dishwashers are 24 inches wide, 24 inches deep, and 34 to 35 inches tall (adjustable with leveling feet). The end panel should cover the visible height and depth, typically extending from the floor to just below the countertop.
Check the cabinet depth. Base cabinets are usually 24 inches deep, so the panel should match or slightly exceed that depth to align with the cabinet face. If the dishwasher is recessed or the cabinets have a face-frame overlay, adjust the panel depth accordingly.
Consider the attachment method. Some panels attach directly to the dishwasher using screws through pre-drilled holes. Others mount to a filler strip or cleat attached to the adjacent cabinet or wall. The method affects panel thickness and edge detailing.
If ordering a pre-finished panel, verify the finish code or sample against the cabinets in natural light. Wood tones and stains can vary between production runs, and computer screens don’t always show accurate color.
Measuring and Preparing for End Panel Installation
Accurate measurement is critical. Start by measuring the height from the floor to the underside of the countertop at the dishwasher location. This is typically 34½ inches, but verify it, countertops aren’t always level.
Measure the depth from the front edge of the cabinet face to the back wall. Most base cabinets are 24 inches deep, but dishwashers may sit slightly recessed or flush depending on how they were installed. The panel should align with the cabinet face or extend flush with the dishwasher door.
Check for gaps between the dishwasher and the adjacent cabinet. A small gap (⅛ to ¼ inch) is normal and will be covered by the panel. Gaps larger than ½ inch may require a filler strip between the cabinet and dishwasher before installing the panel.
Inspect the dishwasher side for mounting holes or brackets. Many dishwashers have pre-drilled holes along the side panel for attaching trim or panels. If not, the panel will mount to a cleat or filler strip.
Gather materials and tools:
- End panel (pre-finished or raw)
- ¾-inch screws (length depends on panel thickness)
- Wood glue (if bonding to a filler strip)
- Edge banding or trim (if raw edges are exposed)
- Circular saw or table saw (for trimming)
- Drill/driver
- Level
- Measuring tape
- Safety glasses and hearing protection
If the panel is raw wood or plywood, finish it before installation. Apply primer and paint, or stain and topcoat, allowing full cure time. Unfinished panels can be difficult to paint in place without getting finish on the dishwasher or floor.
Step-by-Step Installation Guide for Dishwasher End Panels
1. Confirm dishwasher placement and level. Before attaching the panel, make sure the dishwasher is properly installed, level, and secured to the underside of the countertop. Adjusting the dishwasher after the panel is on creates gaps and misalignment. Many dishwasher installation guides emphasize securing the unit first.
2. Trim the panel to size if needed. Lay the panel face-down on a work surface. Measure and mark any cuts using a straightedge. Use a circular saw with a fine-tooth blade (60+ teeth) for clean cuts on veneer or melamine. Cut slightly oversized, then sand to final dimension to avoid chipping the finish.
3. Apply edge banding if edges are exposed. If the panel has raw plywood edges, apply iron-on edge banding that matches the finish. Trim excess with a utility knife and sand lightly. This step is skipped if the panel is pre-finished with finished edges.
4. Position the panel against the dishwasher. Hold the panel in place, aligning the top edge just below the countertop and the front edge flush with the cabinet face. Check for level and plumb. Mark the position lightly with a pencil.
5. Attach the panel using screws. If the dishwasher has side-mounted holes, drive ¾-inch screws through the holes into the back of the panel. Pre-drill pilot holes in the panel to prevent splitting. If there are no mounting holes, attach a 1×2 cleat to the adjacent cabinet or wall, then screw the panel to the cleat from behind.
6. Secure the bottom edge. If the panel sits on the floor, use a small L-bracket or finishing nails at the bottom edge to prevent the panel from shifting. Some installers run a bead of construction adhesive along the bottom edge for added stability.
7. Install trim or molding if needed. If there’s a gap between the panel and the floor, add toe-kick molding to match the cabinets. If the panel meets the countertop, a small cove molding or quarter-round can cover the seam, though this is often unnecessary if the fit is tight.
8. Touch up fasteners and seams. Fill screw holes with color-matched putty or use screw caps if provided. Wipe down the panel with a clean cloth to remove dust and fingerprints.
For built-in dishwashers with custom panels, the process is similar but may involve mounting the panel to a frame or using specialized trim kits designed for the specific dishwasher model.
Common Mistakes to Avoid When Installing End Panels
Skipping the finish work before installation. Painting or staining a panel after it’s mounted is messy and rarely looks professional. Always finish raw panels completely before attaching them.
Not accounting for dishwasher leveling feet. Dishwashers have adjustable feet that raise or lower the unit by up to an inch. If the panel is cut before the dishwasher is leveled, the fit will be off. Always level the appliance first.
Using screws that are too long. Screws that penetrate too far through the panel can push it away from the dishwasher or crack the finish. Use screws that are ¼ inch shorter than the combined thickness of the dishwasher side and panel.
Ignoring grain direction and finish orientation. Wood grain should run vertically on end panels to match cabinet doors. Double-check the orientation before cutting or mounting.
Forcing a tight fit. If the panel is even slightly oversized, it will bow or refuse to sit flush. Trim panels to allow a 1/16-inch gap at the top and sides for expansion and adjustment.
Forgetting to check for plumbing and electrical access. The dishwasher installation process requires access to water supply lines and electrical connections, usually from the adjacent cabinet. Make sure the panel doesn’t block future service access.
Not securing the panel at multiple points. A single screw at the top isn’t enough. Use at least three fasteners along the height of the panel to prevent warping or movement over time.
Conclusion
Installing a dishwasher end panel is a straightforward project that delivers a polished, built-in look without major expense or skill. With accurate measurements, proper prep work, and attention to finish details, most DIYers can complete the installation in an afternoon. The result is a kitchen that looks cohesive and intentional, with no raw edges breaking the visual line.