The Delta ShopMaster table saw has been a staple in home workshops for decades, delivering reliable performance without very costly. Whether you’re ripping sheet goods for a cabinet build or making crosscuts for trim work, this saw handles the core tasks most DIYers need. It’s not a premium contractor saw, but it doesn’t pretend to be. Instead, it’s built for hobbyists and homeowners who need a solid tool that won’t take up half the garage or require a second mortgage.
Table of Contents
ToggleKey Takeaways
- The Delta ShopMaster table saw is a lightweight, affordable benchtop option (45–65 lbs) ideal for DIYers who need portability and basic cutting capabilities without expensive contractor-grade equipment.
- With a 10-inch blade, 13–15-amp motor, and 24–26-inch rip capacity, the Delta ShopMaster handles common tasks like ripping plywood, cutting framing lumber, and trim work, but struggles with thick hardwoods and continuous heavy use.
- Proper initial setup—including blade alignment, fence tuning, and secure mounting—is critical; misaligned blades and loose fences are the leading causes of poor performance and safety issues.
- Routine maintenance such as vacuuming dust, waxing the table, cleaning the blade, and checking the drive belt keeps the Delta ShopMaster running reliably and extends its lifespan.
- Avoid using the saw for production work or precision joinery requiring tolerances tighter than 1/64-inch; upgrade the fence or build a crosscut sled for better accuracy on critical projects.
What Is the Delta ShopMaster Table Saw?
The Delta ShopMaster is a benchtop table saw designed for portability and convenience. Unlike full-size cabinet saws that weigh 400+ pounds and need dedicated floor space, the ShopMaster typically weighs between 45 and 65 pounds depending on the model. It’s meant to sit on a workbench or a folding stand, making it ideal for smaller workshops or job sites where you need to move the saw around.
Delta produced several ShopMaster models over the years, most featuring 10-inch blades and 13 to 15-amp motors. These aren’t industrial-grade machines, they run on standard 120V household circuits, which is convenient but limits the motor’s power compared to 240V contractor saws. The saw’s design prioritizes affordability and ease of setup over heavy-duty continuous use.
Most ShopMaster units come with an aluminum or stamped steel table (not cast iron), a basic rip fence, and a miter gauge. Expect a rip capacity of around 24 to 26 inches to the right of the blade, which handles a full sheet of plywood when ripping lengthwise. The saw’s footprint is compact, and many DIYers appreciate the ability to store it on a shelf or under a bench when not in use.
Key Features and Specifications
Understanding what the ShopMaster offers, and what it doesn’t, helps set realistic expectations. Here’s what you’ll typically find across the model range:
Motor and Power:
- 13 to 15-amp universal motors (depending on the specific ShopMaster model)
- No-load speeds around 4,500 to 5,000 RPM
- Adequate for ripping dimensional lumber (2x4s, 2x6s) and plywood, but will bog down in thick hardwoods or continuous heavy cuts
Table and Fence:
- Table size: Usually 20 x 27 inches or similar: smaller than contractor saws but sufficient for most DIY projects
- Rip fence: Basic T-style or stamped steel design: adequate for rough carpentry but may require tuning for precision joinery
- Miter gauge slots: Standard 3/4-inch spacing: aftermarket miter gauges and sleds fit without modification
Cutting Capacity:
- Maximum rip capacity: 24 to 26 inches to the right of the blade
- Maximum depth of cut at 90°: Approximately 3 to 3-1/8 inches (handles 2x material easily)
- Maximum depth of cut at 45°: Around 2 to 2-1/4 inches
Safety Features:
- Blade guard with anti-kickback pawls (often removed by users, but keep it on whenever practical)
- Push-button or paddle-style on/off switch (some models include magnetic switches that prevent accidental restart after power loss)
Portability:
- Lightweight enough for one person to carry, though awkward due to size
- Many users pair the saw with a folding stand or build a mobile cart
For those seeking woodworking project plans that match this saw’s capabilities, focus on trim carpentry, small furniture, and general home repairs rather than fine cabinetry or hardwood milling.
Performance and Best Use Cases
The ShopMaster excels at the bread-and-butter tasks most homeowners need: ripping plywood for shelving, cutting framing lumber for a shed, and trimming down boards for basic furniture projects. It’s not designed for production work or continuous operation, but for intermittent DIY use, it performs reliably.
Where It Shines:
- Sheet goods: Ripping 4×8 plywood or OSB down to manageable widths. The rip capacity handles full sheets, though you’ll need support for the outfeed.
- Framing lumber: Cutting 2x4s, 2x6s, and 2x8s for deck builds, shed frames, or interior partitions.
- Trim and molding: Crosscutting baseboards, door casings, and window trim. Pair it with a good crosscut sled for cleaner results than the stock miter gauge provides.
- Basic joinery: Dado cuts for shelving or simple rabbet joints are doable with a stacked dado set (check your model’s arbor length, some ShopMaster saws accept dados, others don’t).
One detailed review highlights the saw’s portability and value for hobbyists, noting that while it lacks premium features, it handles common tasks without complaint.
Where It Struggles:
- Thick hardwoods: The motor bogs down in 8/4 oak or maple, especially on long rip cuts. Make multiple shallow passes if needed.
- Precision joinery: The stock fence and lightweight table make it harder to achieve repeatable cuts within 1/64-inch tolerances. Upgrade the fence or build a crosscut sled for better accuracy.
- Continuous use: Run the saw for hours at a time, and the motor will overheat. Let it cool between extended sessions.
Safety Note: Always wear safety glasses and hearing protection. The universal motor is loud, often 95+ dB. Use a push stick for any rip cut narrower than 6 inches, and never reach over the blade. Keep the blade guard in place unless you’re making a cut (like a dado) that physically requires its removal.
Setup and Assembly Tips for Beginners
Out of the box, the ShopMaster requires some basic assembly and tuning. Don’t skip this step, most complaints about accuracy trace back to poor initial setup.
Initial Assembly:
- Attach the blade guard assembly to the splitter or riving knife mount (if your model includes one). Some older ShopMasters use a traditional splitter: newer units may have a riving knife that moves with the blade.
- Install the rip fence and check that it locks parallel to the miter slots. Measure from the front and back of a miter slot to the fence face at the same distance from the edge. If it’s not parallel, loosen the fence rail mounting bolts and adjust.
- Mount the miter gauge. It should slide smoothly in the slots without slop. If it’s loose, add tape or shim the gauge bar.
Blade Alignment (Critical):
A misaligned blade causes binding, kickback, and burn marks. Here’s how to check and adjust:
- Unplug the saw. Raise the blade to full height.
- Pick a carbide tooth and mark it with a marker.
- Measure the distance from that tooth to the left miter slot at the front of the blade. Write it down.
- Rotate the blade 180° so the same tooth is at the back of the table. Measure again.
- If the measurements differ by more than 0.010 inches, adjust the trunnion bolts under the table. Loosen them, tap the motor assembly into alignment, and retighten.
Consult your manual for trunnion locations, they’re usually accessible through the table insert opening or from underneath.
Fence Tuning:
The stock fence often needs tweaking. Check for parallel alignment as described above, and verify it locks securely without shifting. If the fence deflects when you push on it, consider upgrading to an aftermarket fence (Vega, Delta T2, or Shop Fox are common choices).
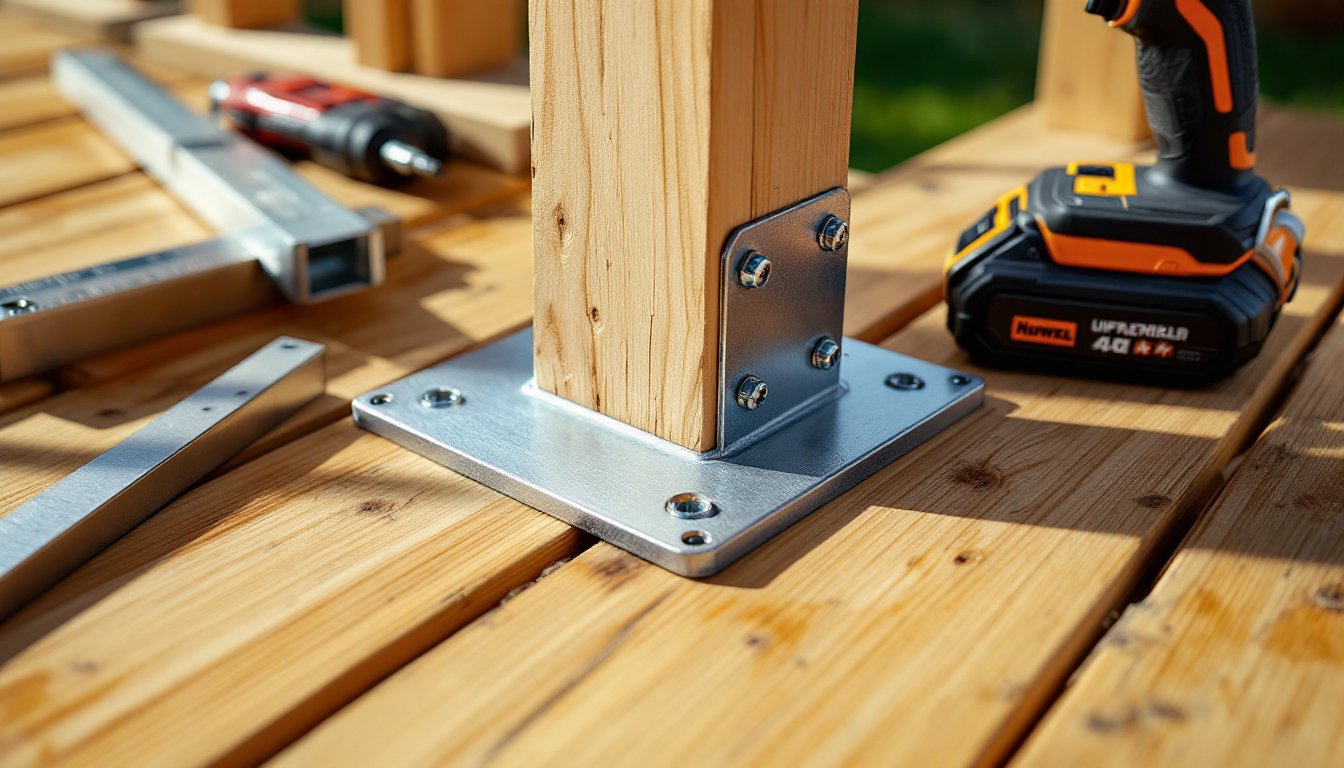
Stand or Bench:
Bolt the saw to a sturdy workbench or mount it on a folding stand rated for at least 300 pounds. An unstable base leads to vibration, poor cuts, and safety risks.
Maintenance and Care Essentials
Routine maintenance keeps the ShopMaster running smoothly and extends its lifespan. These saws are simple machines, there’s not much to break if you treat them right.
Cleaning:
- After each use, vacuum sawdust from the motor housing and table. Dust buildup around the motor vents causes overheating.
- Wipe the table with mineral spirits to remove pitch and resin, then apply a light coat of paste wax (Johnson’s or Minwax) to reduce friction. Buff it smooth, this makes pushing stock easier and prevents rust.
- Clean the blade every few projects. Soak it in oven cleaner or a commercial blade cleaner (CMT Formula 2050 works well) to dissolve pitch buildup.
Lubrication:
- Trunnion gears and height adjustment: Apply a light machine oil or dry lube (like PTFE spray) to the gears and worm drive that raise and tilt the blade. Avoid heavy grease, it attracts sawdust.
- Miter slots and fence rails: Wipe with a dry cloth, then apply paste wax. Don’t oil these surfaces: oil collects dust and gums up.
Belt and Motor:
- Check the drive belt for cracks or glazing every six months. Replace if worn, belts are cheap and easy to swap.
- Listen for unusual motor sounds (grinding, squealing). Brushes in universal motors wear out over time: replacement brushes are available from Delta or third-party suppliers.
Blade Care:
- Keep a sharp blade on the saw. Dull blades cause the motor to work harder, increasing the risk of kickback and burning the wood.
- Use the right blade for the task: combination blades (40 to 50 teeth) for general use, rip blades (24 teeth) for fast cuts along the grain, and crosscut blades (60+ teeth) for cleaner cuts across the grain.
Common Issues and Troubleshooting
Even well-maintained saws develop quirks. Here’s how to diagnose and fix the most common ShopMaster problems.
Motor Won’t Start:
- Check the power cord and outlet. Test with another tool to confirm the outlet works.
- Inspect the on/off switch. Older models use mechanical switches that wear out: replacements are inexpensive.
- If the motor hums but doesn’t spin, the start capacitor may be dead (on models with induction-start motors). This is a $15 part you can swap yourself.
Blade Binds or Burns Wood:
- Misaligned blade is the most common cause. Re-check blade-to-miter-slot alignment as described in the setup section.
- Dull blade: Replace or sharpen it. A blade should cut cleanly without you pushing hard.
- Fence not parallel: Re-tune the fence so it’s perfectly parallel to the blade.
Excessive Vibration:
- Check the blade for damage or warp. Spin the blade by hand and watch for wobble.
- Loose arbor nut: Tighten it snugly, but don’t overtighten (you’ll strip the threads).
- Worn drive belt: Replace if cracked or frayed.
- Unstable mounting: Secure the saw firmly to its bench or stand.
Poor Cut Quality:
- Upgrade the miter gauge or build a crosscut sled. The stock miter gauge is basic and often sloppy in the slots.
- Support long or wide stock with roller stands or an outfeed table. Unsupported material sags and causes binding.
- Use a zero-clearance insert to reduce tearout on plywood and veneer.
For additional context on newer Delta table saw models and features, this review of the Delta 36-725T2 offers insight into how the brand has evolved, though the ShopMaster line predates that contractor-grade model.
Conclusion
The Delta ShopMaster table saw remains a solid choice for homeowners who need a reliable, portable saw for occasional projects. It won’t replace a cabinet saw in a professional shop, but it handles the tasks most DIYers face, ripping plywood, cutting framing lumber, and basic joinery, without drama. Invest time in proper setup and maintenance, and the saw will serve you well for years.